Friday, May 28, 2010

Fin Placement


Fin placement along with fin type determines how fast your board is and how your board turns. Traditional surfboards didn’t have fins which made turning and big wave surfing very difficult. The distance between your fins and how far your fins are from the tail are very important they change how fast your board is and its maneuverability. If your fins are spaced close together then your board will turn easier. The farther your fins are from the tail of the board the looser it will be. There are four main types of fin placements there is the single fin, twin-fin, tri- fin, and the quad-fin setup.

The single fin is mostly found on long boards. The benefit of this is that it gives you less resistance which means more speed. The maneuverability of this set up depends on how big or small your fin is.

The twin fin mostly found on fishes because it is very loose and is good for doing spin tricks. The twin fin set up is not as fast as a single fin but are excellent for stalling in barrels.

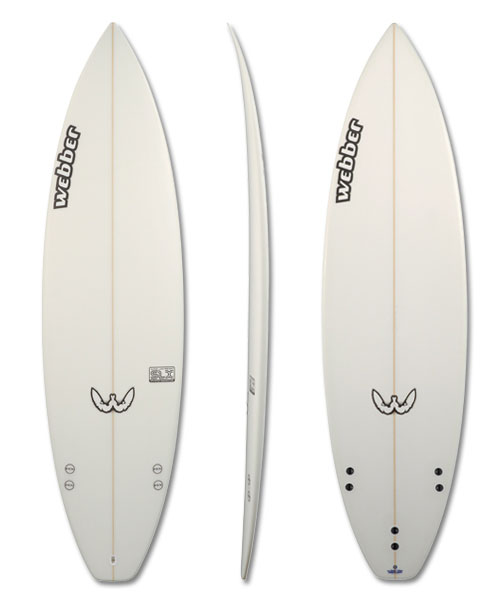
The tri fin or thruster fin set up is the most common. They are a combination of the single fin and the twin fin and offer you stability along with maneuverability.


The quad fin set up is not very common and is mostly found on fishes. This is basically two twin fins right behind each other. It gives you the maneuverability of a twin fin with some extra stability.

Deck Pads


If you are going to be riding a short board then you are going to want a deck pad. Deck pads are placed where you put your back foot on the board and are a replacement for wax on the tail of your board. They prevent your back foot from slipping off the board, and make it much easier for you to dig into the wave and make really hard turns. They are also good because unlike wax you only need to put them on once. Deck pads come all shapes, sizes, colors thicknesses. They can come in either multiple pieces or one piece.

When you have bought your deck pad and want to put it on your board first take all the wax off of the area that you are going to be placing It. If you can’t get the wax off then you should just leave your board in the sun for about 15 minutes. You just want to get your wax soft so don’t leave it in the sun for too long. Once your wax is soft you are going to need a wax scraper or maybe just one of your friend’s credit cards. If you still can’t get that wax off then you can use some paint thinner. Once you have the wax off you want to read the directions (words on back of deck pad) on how to put it on. Putting on a deck pad is just like putting a sticker on something (just make sure your put it on straight). If you have a multiple piece deck pad you just want to line up all of the pieces on your board. You only have one shot at getting it on straight because once you place it on your board there’s no getting it off.

Fins


Fins are probably the most important part of your board. They are the things that give you traction when you’re riding on the wave. Fins come in many shapes, sizes, flexibilities, and color and they all make your board ride differently. You may think that you can just put any type of fins on your board but you’re wrong. First you need to buy fins that are the right size for your board. Then you need to find fins that will fit into your fin plugs on your board.

There are two different types of fins. The first is the glassed on fins, these are really sturdy but it they break then you are screwed. So I would recommend on getting a board with fin plugs so you can change out your fins every once in a while. The second types of fins are removable fins. The two main brands of removable fins are FCS and Future fins. The differences between these two brands are the fin plugs (make sure that your buying fins that will fit in your boards fin plug). The length of the fins makes a huge difference in your turning abilities. The longer the fins are the more traction you will get (good for big waves). Which means it will be harder for you to turn but you won’t slide out on the wave. If you’re planning on sticking to the smaller waves or doing a lot of turns and carves then you’re going to want shorter fins because they give you more maneuverability. When you buy fins make sure that you pick up a fin key. A fin key allows you to put in and take out your fins it’s basically an Allen wrench on a piece of plastic.

Epoxy Surfboards VS. Fiberglass Surfboards

There are two different types of surf boards there is the traditional fiber glass boards and the newer epoxy boards. Fiber glass boards are hand shaped and hand glassed. Fiberglass boards allow you the option to customize everything from the length, thickness, wideness, fin placement, paint job, and tail type. The main shapers on the north shore are Pyzel and Shaper.

Epoxy boards are made by machines. They are a little bit stronger and giver you more floatation with less weight. So if you’re planning on dinging your board a lot I would go with epoxy boards. I have tried both types of boards and personally I like fiber glass boards better than epoxy but its more but hey its your money so get the type of board that you like better. If you are unsure and want to try the boards before you spend a month’s paycheck you can test out different boards at surf and sea in Haleiwa.

Ding Repair


When you are learning you are bound to ding your board. When this happens you should get out of the water immediately because your board is like a sponge and it will suck up water and get heavy and yellow. When you get out of the water you can do two things to get the water out of your board. You can suck out the water as if it was a venomous snake bite or you can leave it in the sun to evaporate (I do both when I ding my board surfing).

Once you have the water out of your board you have two options repair your board yourself or pay someone to do it professionally. If I were you I would just pay someone because chances are you going to do a crappy job, get super pissed off and then punch your board creating another ding. Ding repair only cost about fifty dollars which is reasonable since a bottle of resin and catalyst cost about twenty. If you just have a really small ding then you can just mix up about an ounce of resin and about 5 or six drops of catalyst. Once you mix these two chemicals together you have about 7 minutes to brush it on your board before it starts to get hard. Once it dries then you are going to want to lightly sand the ding until it is has the same texture as the surrounding fiberglass.
(small ding to the left, this ding you can repair yourself)
(bad ding below definetly pay to get it fixed profesionally)

Surf Bags

Board bags are pretty self explanatory. It’s a bag that you put your board into; it protects your board while you are not using it. Right now your probably like “where can I get one of these and how mush cash do I have to spend for one”. Well board bags can range from twenty dollars all the way to 400 dollars. There are many places where you can find these, they sell them at Surf and Sea, Tropical Rush, and pretty much every other surf shop in Haleiwa or in Hawaii for that matter.

When you are picking out your board bag you should consider three things.
What length of a board bag do I need for my board?
How much padding do I want for my board? (Depends how far you’re traveling for surf, and were you are going store your board.)
And how much cash do I want to spend?
There are three or four different types of board bags that come in all shapes, sizes and prices. There is the sock, the hard case and the standard board bag.

The sock is the cheapest and cost anywhere from $15 dollars for $50 dollars. It is basically huge sock that you just put around your board. They are excellent if you are just storing your board in your room or in your garage. These are perfect for bringing to the beach with you because not only do they protect your board they also double as a towel. However board socks are not perfect they don’t offer as much protection as standard bags and the hard shells. If you are going to buy a board sock you will need one that is about the same size as your board in length and wideness.

The Standard board bag is water proof and will offer your board great protection. However they are a bit more expensive and range from 50 dollars to 150 dollars. Most of these bags have a nice thick layer of foam on the inside to protect your precious board from dings. The cool thing about these board bags is that they offer bags that hold more than one board, which is good if you have multiple boards that you want to protect.


If you are going to be bringing your board on an air plane or are just over protective about your boards you can get a hard case. These are made out of thick plastic, you can pretty much throw this out of a two story house and chances are your boards will be just fine. The downer is that they cost a lot and can cost anywhere from 80 dollars to 400 dollars.

Leash


A leash is a polyurethane cord that attaches the tail board to your leg. The thicker the leash is the stronger it will be, however the thin leashes give you less resistance and allow you to go faster on the face of the wave. The leash saves your board from getting taken in and smashed up against rocks by the waves when you fall. If you don’t have a leash, be prepared to do a lot of swimming each time you fall.

A leash also makes the lineup a lot safer because you don’t have to worry about getting hit by stray boards. When you pick out a leash you want it to be about 8 inches longer than your board. If it is too long then it will get tangled around your legs and on the reef. If it does get tangled on the reef try to remain calm and pull the cuff off of your leg. If your leash is too short then you have to watch out for your board flinging back at you after the wave pulls on it.

A leash is made out of four essential parts the cord, rail saver, cuff, and swivels. The cord is made out of polyurethane which is very strong. The cord can come in an assortment of colors that just make your board look cooler. The rail saver is the flat piece of material that protects your rails from the tension of the cord on your rail. On end of the rail saver is attached to your leash plug and the other is attached to the cord. The cuff is the part that you attach to your leg. You want to put the cuff on the foot that will be on the back of your board (Dominant foot). The swivels are a very important part of your leash they allow it to twist and turn with out your leash getting all tangled.

How To Do A Hang ten

To be a good long boarder you need to have style. Style comes from balance and coordination. A trick that utilized both of these skills is a hang ten. A hang ten is when a surfer walks to the front of his board and stands with all of his toes just barely hanging off of his board.

To do a hang ten you need to catch a wave with a long face so you have time to get to the nose of your board. Once on the wave you’re going to slowly walk up to the nose of your board. The less wobbly you are the better it will look so try to stay stable. As you get closer to the nose of your board you will start to speed up, and feel your fins lift up. If you walk to fast up to your nose then you will pearl (pearling is when the nose of your board goes under the water) and fall on your face. Once you get to the nose you want to stand straight up and bask in the feeling of flowing along with the wave.

How To Do Turns


Once you have learned how to stand up and keep your balance on a wave. You’re going to want to learn how to turn and build up speed to do tricks. When you stand up on a wave you are going to keep a low center of gravity, then simply lean which way you want to turn. Remember to look where you’re going instead of your board: your body will follow your eyes.

The beauty in surfing is that it you have let the wave do the work for you. You want to look like your just effortlessly flowing with the wave and not against it. To do this you have to know how to build up speed. To build speed you try to turn so that you’re going almost parallel to the wave. Then you pump, you can do this by leaning towards the top of the wave then leaning back down. This makes you go up and down on the face of the wave and will make you speed across the wave. You can also build speed by slowly leaning forward and staying parallel with the wave.

Now that you have built up a lot of speed you need to dispose of it (Unless you like going really fast). A good way to do this is by doing a cut back. To do a cut back you need to go up to the top of the wave. Then you need to focus most of your weight on your back leg and turn hard back toward the white wash. It will be much easier if you look back to where you want to turn. You’ll be surprised how your body follows your eyes. Now that you know how to turn and gain speed go surf and have fun. The more you do it the better you will get.

How To Stand Up On A Short Board


If you want to jump straight to short boarding you can. It will just require a little bit more balance and coordination to quickly jump to your feet. Since a short board has less flotation than a long board you will need to paddle harder to move, so expect your arms to hurt after the first couple of times surfing. To use a short board the waves have to be at least head high or bigger. This is because it takes more wave power to get your board to hydro plane. If you are going to learn how to surf on a short board you can’t be afraid to get worked by a couple waves, because you will definitely eat a few waves before you can actually stand up without falling.

When you’re sitting out on the line up you want try and be a little bit deeper (closer to the peak of the wave that is breaking) and farther in than the long boarders because you need to catch the wave right before it peaks. When you see catchable waves with no-one on it, start to paddle inward. Remember to be looking back at the wave and not straight ahead, because you need to be positioning yourself directly in front of the wave. When you feel the wave starting to pick you up you can kick your feet to get an extra boost of speed. Once you have built up your speed and are in the wave grab onto your rails and then support most of the weight with your arms. Bring your front foot up under your chest. Then in one fluid movement stand up while bringing your back foot up under your hip and place it on your deck pad (If you don’t have one just put your foot by the back of your board). Once standing lean towards the face of the wave so you don’t get trapped in the white wash. It will take you a lot of tries before you get the process down just keep trying and don’t give up.


Catching Your First Wave


You have finally made it out to the line up and realized that you know nothing about catching a wave. You don’t want to look like a fool, especially if there’s potential dates out there. Once out at the line up you have to watch the waves. Watch where the waves break and how they form. Then paddle over and try to be about 10 to 15 feet out from where the waves break. Now all you have to do is wait for a wave with nobody on it and paddle.

When you see a wave that you want to catch you have to make up your mind and decide if you’re going to go right or left. You don’t want the wave to close out on you so go the way that has an open face. When you’re paddling for the wave you either want to be paddling straight in or at an angle. While paddling for the wave you should be looking back at it so you can see what the wave is doing. Then when you feel the wave starting to pick you up and push you face forward and paddle hard. You will then notice the wave pushing you and you can then stop paddling. Grab onto the rails of your board and do a push up to get onto your knees. On your first wave it might be good to just stay on your knees and get the feel of your board on the wave, just lean to the left and the right so you can practice turning. After you got the feel of your board on the wave you are ready to stand up and start surfing.

When you paddle for the wave you want to first get onto your knees then put your front foot forward and stand up and watch the face of the wave in front of you. Try to avoid from looking at your feet because then you will get all wobbly and most likely fall. It might be helpful to know that it is easier to keep you balance when your going fast on the face of the wave. It’s ok to fall while you’re learning; just make sure you don’t fall onto someone else. As you get better and catch bigger waves it will get easier to stand up and to do turn’s.
Surfing:
How To Surf A Wave In One Day

How To Duck Dive


When you’re paddling you will probably encounter some white wash that will make it almost impossible for you to get out to the line up. Knowing how to duck dive will save you a lot of time and keep you from running out of energy. Though duck diving wont work if your board has too much flotation for you to push it under the water. When you see a wave about to break you want to paddle a little bit faster than normal to build up momentum. Then when the wave is about 4 to 5 feet in front of you, place your hands on the rail right next to your shoulders then get onto your knees. Once you’re on your knees lean forward and your nose should go under the water. Then put your head under the water and lift up your dominant leg to get the tail of your board to go under the water. If you do this correctly then you will quickly pop up on the other side of the wave. Don’t get discouraged if you can’t duck dive right away; when I was learning it took me a couple months before I fully mastered the duck dive.

If you are using a long board and can’t get it under the water then you can try to turtle. When you’re paddling and you see a white wash about 5 feet in front of you, then you move up towards the nose of your board. Then once you have a firm grip about 1 to 2 feet down from the nose of your board flip over and hold on tight. The wave will then just pass right over you. This method only works on small waves once it gets to big the wave will just rip the board out of your hands. If the waves are too big to turtle you can always just bail your board and swim as deep as you can.

How To Paddle

You are almost in the water but then think “I don’t even know how to paddle.” If you have never paddled a surfboard before then it will be hard to balance your body on your board especially since your floating on moving water and sometimes being knocked around by waves. Most surfers make paddling and surfing look effortless, but it is really not. When you are lying on your board, you want to about in the middle so that your nose isn’t up in the air and your tail isn’t submerged in the water. Most people while learning positions themselves towards the back of the board which makes your nose rise out of the water and creates a lot of resistance that will slow your down.

When you start to paddle you want to have the same rhythm as if you were swimming though you want to keep your head up. You also don’t want to take as long as strides as you do in swimming. Also remember to take your time its not a race to get out to the lineup and since your not used to paddling everyday you will tire easily. If you are paddling in ruff water or chop then you can left up your chest and this will keep your nose from going under the water and spraying your face with an uncomfortable salty mist.

Sunday, May 23, 2010

Surf Wax


When you’re standing on the beach ready to paddle out you should be asking yourself two questions. One do you have your leash on the right foot. And two do you have wax on your board. Surf wax is pretty self explanatory but if you’re an idiot I will tell you what it is for. Surf wax is applied to the deck of your board where your feet go and is used to keep your feet from slipping off. It is also put on the rail where your hands go so that they don’t slip while duck diving.

There are thousands of brands of surf wax that come in all shapes, colors, and cents. My favorite brands are Sex wax and Sticky Bumps mostly because they smell really good and give me a lot of grip to do turns and tricks. To apply this wax you are going to have to complete three mind bending tasks.
Step 1: Take plastic of bar of wax
Step 2: Rub wax in a circular motion where you will be placing your feet until it forms bumps on your board.
Step 3: go surfing.

It’s really not that hard and should only take you about 2 minutes. If you get the smart idea to put wax on the bottom of the board, don’t do it. It will slow you down on the wave and most importantly make you look retarded. To make your wax stay sticky, you can comb it with a wax comb. This will save you a ton of money on wax and will make one bar last twice as long.


Golden Rules of Surfing

Surfing is just like every other competitive sport; you have to wait your turn and respect the people around you. But before you rush out to the surf break you might want to know some basic rules to surfing. The number one rule is to not drop in on another surfer especially if you can tell that they are better than you. Dropping in on someone is when they are already on the wave and you catch it on the shoulder of the wave, or when you are both paddling for the wave but he is in a deeper position than you. Though if you can tell the wave is going to close out on a person and they can’t make the section, then you can take the wave. By not following this golden rule you will ruin people’s surf session and ultimately look like a kook.
( Guy in grey getting cut off by kook)
While learning to surf you should also try to stay out of the way of other surfers. You should do this mostly because you don’t want to take a surfboard to the head. Then when you in their position you should be aware of who is around you so that you don’t hit any one. By following these two rules you will make the line up a more safe and friendly environment.

Things that Effect the Waves


Wind can be either your best friend while surfing or your worst enemy; it just depends on the direction that it is coming from. When the wind is coming off of the shore and going out to see then it is called off shore winds. You want a light off shore wind because it will shape the waves and make them barrel. However, if the off shore winds are to strong then it will be difficult for you to paddle into the waves. If the wind is coming from the sea going onto the shore then it is called on shore winds. On shore winds never make the waves good and are always a downer. They make the waves really mushy and make them just crumble over instead of pitching and barreling.

Current is one of the many enemies of the surfer. Generally current happens in the channel, most of the time you can see where the current because the water is sucking out much faster that the other water around it. If there is a strong current out by the line up then it will be hard for you to stay lined up for the sets. One trick to stay lined up for the waves is to pick a spot on the beach and to paddle against the current so that you stay lined up with your marker point. By doing this you will be able to get in a good position before the set and will have a much better chance on catching a wave. Generally lifegaurds will post strong current sighs if it is not safe to paddle out.

Tide is another factor that can either make the waves really fun and powerful or mushy and weak. For most breaks you want it to be either low tide or in-between low and high tide but it really depends on the reef. If it is low tide then the waves will have more power and will barrel. But, this might not be good for a beginner to learn on because you will have less time to stand up and if you fall there’s a good chance that you will hit the reef.

Saturday, May 22, 2010

Picking Out a Surf Board


Before you can paddle out and surf you are going to need some equipment. The most important piece of equipment that you will need is a surfboard. But before you go out and buy a 200 dollar board you need to find out what type of board you want to ride.

I would recommend starting on a long board (to the Right) because they are much easier to paddle and to stand up on. They are also really good for catching small waves which is what you should be learning on. The bad side of long boards is that they offer you limited maneuverability and since they have so much floatation you get worked if you get caught inside by a set. If you find yourself about to get worked by a set and have a long board you can always turtle or ditch your board and dive to the bottom. To turtle is when you flip over and hold on to your board from the bottom, -- the wave will then just pass right over you and you will be able to flip back over and continue paddling. But if you are planning on becoming really good at surfing then you want a short board.


A short board ( on the left) offers you a lot of maneuverability and if you’re good enough it offers you a wide variety of tricks. However a short board is a lot slower and requires more effort to paddle, but if you do get caught inside with a short board you can easily duck dive under the waves. A duck dive is when get onto you knees and push you board under the water.

If you do not have a surfboard there are many places on the north shore that you can rent a board or even take lessons. You can rent a board at surf and sea which is located in Haleiwa next to the harbor. Here they have a wide variety of boards that you can rent, both long board and short.


Deciding Your Stance Regular vs. Goofy

How can you tell if you are regular or goofy? Knowing if you are regular or goofy is very important in surfing because you don’t want to be standing unbalanced with your leash on your front foot. Everyone will call you a “kook” then you will loose all of your self esteem. Your stance determines which foot you put your leash on and what direction you should go on the wave. If you know how to skate or snowboard then you already know which foot you are going to put on the tail of the board.

You want to put your dominant foot on the back of the board. Generally most people have a regular stance this means that you would put your leash on your right foot. If you are regular, you are looking for a wave with a right face because it is easier for you to stand facing the wave.

If your dominant foot is your left foot, then you want to put your leash on your left foot and stand up with your right foot in front of your left. It will be easiest for you to learn on a left wave rather than a right but it won’t make that much of a difference.

(left foot on back of board "goofy stance" )


(Right foot on the back of the board "Regular stance")

Wave Size


Wave size is very important especially if you are a beginner. When you are looking for surf you are not looking for a big wave. This is because you are unfamiliar with the break and do not know the reef. No matter how good you think you are at swimming it might not save you from a fat set on a shallow reef. Even if the wave looks like it is only about 8 feet tall (from the face) it still packs a lot of power especially for a beginner who doesn’t know how to duck dive. You also have to remember that the waves look a lot bigger when you’re lying down on your board.

What you are looking for is a small wave with nice shape. I would suggest a head high wave with a long standing face such as Chun’s reef. Chun’s reef is an excellent place for beginners because the waves are long and have less strength than most other waves on the North Shore. It is also good because there are tons of other beginners out there so you won’t look like a fool when you fall or mess up.


(Good wave for beginner on the left)
(Bad wave for beginner below)

It is also good to check the incoming swell before you paddle out. Even if it looks small and harmless that can change in a matter of minutes especially if it is the big wave season (January to march). You do not want to be the person that gets in over his head and has to be drug in by the lifeguards.
If you live at a place where you have to drive to go check surf I would suggest going on surfline.com. On this site you can check out the forecast and you can even watch surf breaks through their webcams. So you can pretty much see what you’re going to be surfing without driving anywhere. If you are not near a computer and you want to know how big the waves are you can call the buoys at 808-973- 6114.

Friday, May 21, 2010

Types of Breaks


If you are looking for fun perfect waves you want to look on the north shore of Oahu. The north shore has so many different waves that you can surf and is often referred to as the seven miles of heaven. There are point breaks, reef breaks, and beach brakes. All of these types of breaks are fun and you should surf all types of these breaks to become a well-rounded surfer.

1. Point breaks occur when a wave hits a point of land or rocks that are sticking out of the coastline. These waves can be very long and powerful. They can be good for beginners if they do not close out. Closing out is when the face of the wave in front of you breaks and you become trapped on a slow boring white wash.

2. A reef break is a wave that breaks over a rock bed or coral. These waves generally have a long face and have a lot of power. If the reef is shallow enough then the wave will just peel and barrel for the whole duration of the wave. The good thing about reef breaks is that their constant all year along oppose to sand bars that may only be good for a couple of months out of the year. In my opinion, reef breaks are the most fun because of there power and length. Some examples of reef breaks on the north shore are Pipeline, lanikea, sunset, back yards, and v-land.

3. Beach breaks or sand bars are waves that break on a sandy seabed’s. These waves are excellent for beginners because if you do fall you’re only going to hit sand instead of rock or coral. Beach breaks are generally short waves but are knows for having perfect circular barrels. The downside about beach breaks is that they are seasonal and are only good when the swells push in all the sand onto the beach. Some examples of beach breaks on the North Shore are Wiamea, Log Cabins, and Off The Wall.